One aspect of the buying process that collectors miss whilst browsing through online art listings is being able to get up close to a painting, to get a feel for its texture, size, and how it could fit into their home.
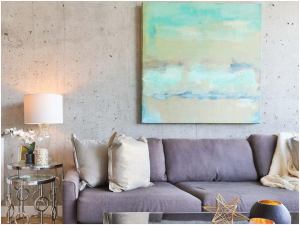
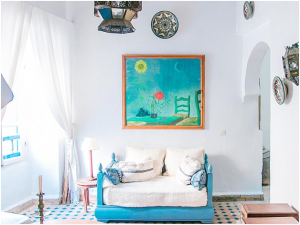
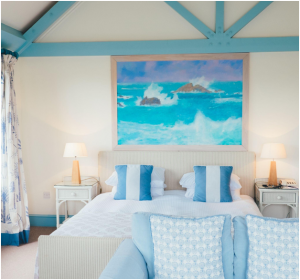
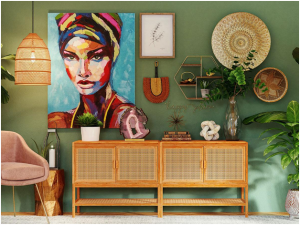
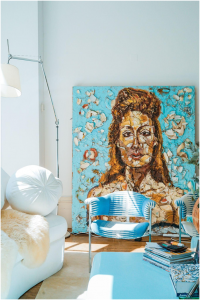
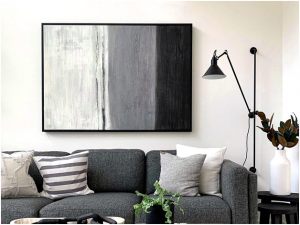
By creating immersive in situ photos, it allows the potential collector to see the artwork in context and envision how it could look in their own space. In situ photos provide collectors with more visual information that can help them make a purchasing decision and make the art buying process seem less daunting.
There are several methods for creating room view photos yourself, without the need for a professional photographer.
Hang and photograph the artwork yourself
Perhaps the simplest way to display your artwork in situ is to photograph it yourself. The brilliant thing about taking photos of artworks in a room is that collectors can see not only the image, but the texture of the painting from different angles and how it appears in natural light settings.
Another thing to consider is your target audience when photographing art. Are you trying to appeal to more commercial audiences, like business offices or hotels? If so, create a setup that resembles the setting your collectors will likely view the art in.
How to create your in situ setup: styling tips
Think about the room in which you place the artwork and the atmosphere you want to convey; this is your chance to show the kinds of effects your painting can have on a viewer. If you want your seascape artwork to exude calm and serenity, it could be apt to place it in a bedroom setting. A lively, bold portrait painting would look great in a social area like a kitchen or living room.
Hanging art in a room with lots of natural light against blank neutral colored walls will make it stand out. This type of setting will also appeal to the majority of people’s tastes.
However, some collectors will want ideas and suggestions for how to frame and hang artwork. If you want to go to town, you could also demonstrate some creative ways to display the art. For example, if you have created a small painting, you could hang it as part of a gallery wall setup.
Dress the image up by placing the artwork over a sofa, or next to some complementary decorations, like plants, light shades, or an ornament that will harmonize with the colors in the artwork.
A painting with texture can benefit from being photographed from multiple angles, to demonstrate the three dimensional and even sculptural aspects of the piece. Whatever you feel makes your work unique, emphasize it in your photos.
Lights, camera, edit
The lighting and camera settings you use will make a huge difference to how the artwork appears; you want to ensure your audience sees it in its best light.
Step 1 – photograph the painting: For optimal lighting, place the art on a wall or shelf in indirect sunlight. If it looks too dark, you could use a studio light with a softbox to brighten it up. A softbox will diffuse the lightstream, meaning that you can avoid glare, reflections and shadows on the artwork. A studio light could be a good investment if you plan to regularly photograph your work. When using artificial light, get bulbs that are close in tone to natural daylight and avoid getting warm colored light bulbs as they could distort the colors in the artwork.
When photographing, it also helps to use a tripod to stabilize the camera to avoid unwanted blur. Take a few shots of the artwork from several different angles and decide which one you like best.
Step 2 – edit and perfect your photos: If the photos you took didn’t turn out perfectly, don’t worry! Whenever I photograph artwork for my website, I always have to do some editing before my paintings look how I want them to look. Load up the photo into Photoshop (or a free editing software like GIMP) and ensure you set the file to high resolution, with an RGB color profile (as this is the color profile used for the web).
Keep in mind when you’re editing that the aim is to accurately represent how the artwork looks. Sometimes photos can skew colors of the artwork slightly. The best thing to do is to keep your artwork beside you while you edit so you can refer back to it. Use the brightness and contrast tool to brighten up the colors. If you think the color has come out too warm or cool in appearance, use the color balance tool to alter it. You could also crop the photo and adjust the perspective to change the composition.
Create in situ mockups to sell your art
Not every artist has the space to create their own room view photo shoots. If that’s the case for you, you have another option. Create your own digital mockup of your painting. There are two ways to go about this, either source your own image of an interior then edit your artwork into it, or use an art preview app to automate the process.
Create a mockup using an app
Art preview apps are a great choice for artists who don’t want to spend the time editing their images. ArtPlacer allows you to use one of their thousands of digital rooms or upload images of your own wall, upload your art, enter the dimensions, and place it. This means that you can create a mockup of the artwork with the correct proportions.
Another great feature of this app is that you can integrate it to your website, allowing your collectors to upload photos of their own room and superimpose paintings onto the wall or see it on their wall with Augmented Reality technology.
ArtPlacer has generously offered a discount for TAA readers. Go to https://www.artplacer.com/signup to start a free trial and enter THEABUNDANTARTIST promo code for up to 30% at checkout.
Create an in situ mockup with Photoshop
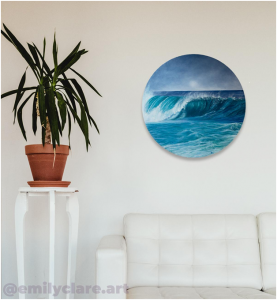
Artwork & mockup image created by emilyclare.art
Photoshop is an indispensable tool for artists. You may already be using it to edit reference photos, or to digitize your artwork to create fine art reproductions. Another great use is creating in situ mockups of your art. This method takes a little more effort than using a preview app, but it gives you more flexibility in choosing photos of rooms to display your art on. Plus if you already use Photoshop for other purposes, it might be a preferable alternative to using one of the paid-for art mockup apps.
The first step is to choose an image of an interior with an empty wall from a stock image site like Pexels or Unsplash. Open your chosen room image in Photoshop, then copy across the image of your artwork into a new layer.
Resize the artwork and move it to your desired location on the image of the empty wall. Add a drop shadow from the layer fx dialogue box to create the appearance of depth under the painting. It may take some time playing around with the settings, ensuring the direction and blur of the drop shadow is right. When you’re happy with the look, save it and ensure the file is in RGB color mode for the web and at a resolution of at least 72ppi.
Where to showcase in situ photos
You’ve done all the hard work of creating beautiful in situ photos, now it’s time to show them off! Post them on your social media platforms, on the product pages of your website, or on the homepage of your site.
In situ photos bring artwork to life, show your best work in real settings and inspire collectors to want to make the painting look that good in their own space. An in situ photo is a finishing touch to an art product page, that shows collectors how the artwork will come together in their home or office. By removing the barrier of imagination from the spatial visualization process, you and your clients can be more creative and intentional about the way in which artwork is installed and displayed.
About the author:
Emily Clare is the publisher at Fine Art Tutorials.
Useful post
Thanks for this info, especially photo tips. I have been using the Canvy app and it seems to work well. See my insitu posts on @jillmusserart.
Artplacer seems to be a great tool. Thanks.
I have come to your website for the first time today and here I have get a lot of information, thank you very much for this.